Month: July 2013

Pumpkin Muffins, Two Ways

It might be a little early for pumpkin recipes. A little. Just a little.

Unlike last year however, this year the weather’s playacting at autumn so I don’t feel quite as strange trying to take photos of pumpkin muffins in 95 degree weather.

One of the downsides of cooking with pumpkin is that when you use canned pumpkin, many recipes only require half of the can or so.  Here’s two recipes that will use a can of pumpkin between them, or make a double batch of either to use up the can.

Gingerbread Pumpkin Muffins

From Bakingdom

1 3/4 cups flour-I used unbleached white
1 tea baking soda
1/2 tea salt
1 tea ginger
1/2 tea cinnamon
1/4 tea nutmeg
1/4 tea allspice
1/4 cup oil
1/2 cup molasses- I used blackstrap, so the muffins in picture are pretty dark
1/2 cup sugar-I used raw
1/2 cup brown sugar-I used homemade
2 eggs
8 ounces pumpkin puree-about half a can
1/4 cup water

Add everything from the oil down into a bowl and mix together. Add the dry ingredients and mix till just combined. Fill lined cupcake pans, and bake at 350 for 15-18 mins. Makes 14 to 16 muffins depending on how full you  make your liners.

Pumpkin Chocolate Chip Muffins

Modified from Foodie.com

1 cup pumpkin

1 egg

2/3 cup sugar-I used raw

1/3 cup applesauce

1 tsp salt

1 tbl pumpkin spice

1/2 cup milk

1 1/2 cup flour-I used unbleaced

1 tsp baking powder

1/2 tsp baking soda

1 tsp vanilla

Chocolate chips

In a mixing bowl combine wet ingredients including the sugar. Mix till combined. Mix dry ingredients in another bowl, then add to the wet mixture.

Fill lined cupcake trays and bake at 400 for 18 mins. Makes 12 muffins.

*The weird formatting comes from cutting and pasting out of a Google Doc.

Linked To-

Little House in the Suburbs     Frugally Sustainable

the chicken chick

Call Me PMC

it’s fall y’all

August is Ghost Month

I do love thematic months on Horrific Knits!

Unfortunately, my follow through sometimes leaves a lot to be desired.

August is ghost and haunting month on Horrific Knits! I have to admit, this is one of my favorite themes to write for. Have a suggestion for ghost month or would like to submit an article? Leave a comment or email me at horrificknits at gmail dot com, and put ghosts and hauntings in the subject line. -Skeptics welcome!-

Interested in last year’s content?

Movie Reviews

Believe     The Skeleton Key     Session 9     House on Haunted Hill

Urban Legends

Enough Room     The Phantom Hitchhiker     The Bansidhe

Short Fiction

  Rooum

Things I Think Are Awesome About Myself

Because I think that living in the type of world that we do*, we all should have a list like this.

1. Gotta fall back on that whole drow eye thing. (I know that most of you probably don’t know what a drow is, but it’s what Mid always tells people).

2. My body is running pretty flipping well, all things considered. The vast majority of my stats are well within the healthy range.

3. My body got me through a full class schedule, a job, pledging, and an honor’s thesis. Then it turned around and got me through grad school.

4. While I may not like the way that dancing always makes me feel mentally, I love the way it makes my body feel afterwards (and I’m fairly confident that I’ll get over the way it makes me feel mentally at some point).

5. I have weird flipper feet, but I love them anyway.

6. My fingers let me both type and knit freakishly fast. Both skills have made people stop and stare.

7. Frankly, I’ve had people just stop and stare at me. And not because I’m too fat to be wearing whatever I was wearing.

8. My hair will never be thick and luxurious- but I have quad-toned highlights.

9. I’ve been told that I have ‘Earth Momma’ thighs and hips. I’ve started seeing this a compliment, considering that She is an archetype and all.

10. To steal a quote from Grey’s Anatomy: “Oh, screw beautiful. I’m brilliant. If you want to appease me, compliment my brain.” I have this habit of appearing vapid and then opening my mouth and spewing out pretty intense thought. This has actually saved me on more than one occasion- and the sensation of reducing a room of people who frankly thought you worthless to silence is, to use an overused cliche, epic.

*I really feel that one of the worst things in the world for living people in general is media, as much as I love it. Did you know that a woman sees something like 400 ads a day and most of them are pointing out flaws that she probably doesn’t have in order to sell her a product that she probably doesn’t need? There’s nothing wrong with your body’s appearance, except trying to fit it into someone else’s definition of beauty.

Matilda (Penn Yan)-A Haunting

spiritThis is a repost from last summer. I spent the weekend going to concerts and making wine charms-which was quite nice and relaxing but then I had to face the reality that I didn’t blog anything for today.

This is the regional breakdown of New York State from a Utica/Cooperstown perspective.

-Albany and its surrounding cities is the Capitol region.

-Anything about 50 miles north of Utica is the North Country

– The Syracuse/Utica/Norwich corridor (Route 8, essentially) is Central New York

-Binghamton and neighbors is Southern Tier

-Western New York starts somewhere between Oswego and Rochester

-The Island is Long Island

-Downstate is Hudson and lower

-There are few specific zones like the Finger Lakes and 1000 Islands

This will obviously vary from person to person, but that’s the general regional zone description I grew up with. For this blog the most extreme point east I’m probably going to work with is Cooperstown, because that’s not far off of center of the state even if it’s not culturally Western New York. Definitely anything west of Syracuse or Rochester.

Moving along, Penn Yan boasts that it is home to a particular urban legend that has gained notority over the years. The Lakeview Cemetary houses the Gillette family plot, where Matilda and Francis Gillette were laid to rest in the late 19th century.

The story goes that the relationship was not the most peaceful and Francis is said to have stated that he would be glad to see Matilda gone as she lay on her deathbed. Her response is said to be that she would never leave him alone, even if it meant returning from the other side to do so.

According to legend, an odd situation developed after Francis was laid to rest several years later. The family tombstone developed an oddly milky appearance- a blemish said to look exactly like Matilda. No matter how the stone was cleaned, the spot remained hovering over Francis’ grave. Depending on source the stone has been replaced or sandblasted, always with the same profile showing up on the tombstone.

This appears to be primarily be an oral legend, only appearing on websites relating to local history or very recent publications on the same.

Wine Charms

winecharmsWe made these really cute wine/glass charms at camp on Saturday. They’re very simple, and are so customizable. They fit over the tops of bottles and the stems of wine glasses and the hair tie won’t harm the glass.

Materials

Fluffy, stretchy hair ties in a variety of colors

Plastic fishing line

a variety of small beads

alphabet beads

super glue

scissors.

1. Cut a length of fishing line to about a foot’s length. Double the fishing line so the two ends are together, making a loop at the other end.

2. You can either bead your of fishing line and then attach it to the hair tie, or I fed the looped end of the fishing line through the hair tie and then the ends of the fishing line through the loop so it made a sort of half hitch knot-you would have the free ends of the fishing line dangling from the hair tie. [This is harder to describe than do, you just want have the fishing line securely attached to the hair tie.]

3. Add the decorative beads. Once you’ve added the decorative beads, decide what word you want your charm to say-mine says Happy but Mid wanted his to have his name on it. Add a few beads after the name/word, then tie off the free ends of the fishing line. Dot the knot with super glue to secure it.

[This isn’t my project, but I was given permission to blog about it. I did make both charms in the photo.]

Linked to

Inspiration Monday     Marvelous Mondays     The Chicken Chick

Inspire Me Monday

Sunday Legends-Dog Days of Summer

dozer

Morguefile stock

We may have gotten past the hottest weather of the year. I hope so. I really don’t like truly hot weather; it doesn’t matter what I do I always feel faintly ill.

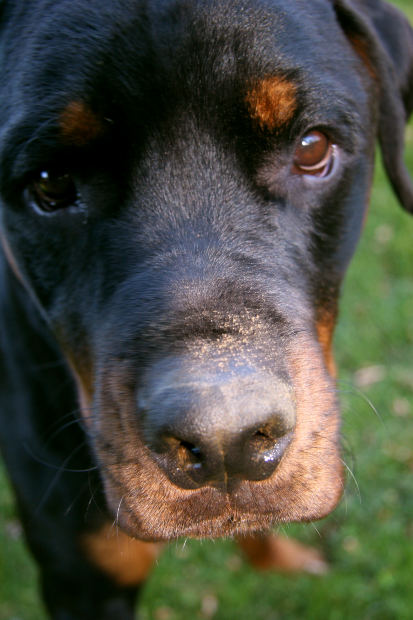
Commonly referred to as the dog days of summer, the hottest days of the year fall somewhere between the middle of July and the middle of August in Buffalo. The term appears to have a slightly muddled pop history. I’ve read in historical notes that the phrase referred to the period of time in the summer when dogs in Buffalo went rabid from the heat.

What is actually being referred to by the phrase was the period of time that Sirius, the dog star, rose at roughly sunrise. The Romans believed that the appearance of the dog star was the harbinger of heat-and the insanity that heat seemed to bring with it. Sirius is the brightest star in Canis Major and is the brightest star in the night sky. The Greeks used the term as well.

Traditionally the dog days run from July 23rd to August 23rd. They are sometimes marked from July 11th to August 11th however.


All-Natural Skin Care for Summer

From Morguefile (free open use stock)-in place of the mess of my neck

From Morguefile (free open use stock)-in place of the mess of my neck

I discovered I had the perfect storm of skin problems going on the back of my neck this weekend.

Frankly, it freaked me out. It was…pretty bad. I mean, bad enough that even though I have a photo so I could see how bad it was, I really don’t want to show you bad. I had a horsefly bite (at least one), an allergic reaction, what was probably sun poisoning from my heat allergy, and at least one major pimple. I felt like I was 15 again-my back has been this bad in the past, but much closer to puberty.

In part because while I know enough about natural healthcare to know that sometimes you really should just go to the hospital and have things looked at, I also had a feeling I could start treatment at home. And the results? It’s still not perfectly cleared up but it’s definitely on its way there-much faster than if I left it alone.

All of these items are things you probably have already, or at least some of them. As with all skincare items, make sure to spot test first and check for sensitivity. Also, if you believe you have an infection issue or are not seeing improvement in the long term you may want to see a specialist to make sure you know what you’re working with.

I’ve got these ranked in price from highest to lowest. I’ve also marked where they fell in my process.

1. Lavender Oil

Tea tree oil is the best bet for skin issues-but it can be pricey. It also tends to be fairly harsh to the skin and a lot of people need to have it diluted before use. Lavender oil on the other hand tends to be slightly cheaper/the same price, and is gentle enough that a lot of people can tolerate it being applied straight. Lavender oil has a lot of the same effects as tea tree oil, helping with clearing up infections. I also like the way it smells better than tea tree oil.

I used this second in my routine.

2. Honey

Honey is actually really, really effective on skin issues. Just avoid thin mucus membranes-and be aware that especially for women, there are certain parts of the body that you don’t want to be adding a lot of sugar to. Be careful with use on children as well; children under a certain age should not consume honey.

Honey contains a lot of antimicrobial agents that aid and speed up healing of skin issues-and potentially not just minor skin problems. I was reading an article recently suggesting that Australian scientists are looking at honey because it’s effective against even MRSA and other antibiotic resistant strains of Staph without increasing resistance. Honey also helps to reintroduce moisture back into the skin.

This was my first step.

3. Apple Cider Vinegar

Apple cider vinegar is great for skin problems-I use it in my hair a lot to calm down my scalp. It helps to dry out pimples, cut down on oil production, and re-balances the pH of the skin. However, it can be drying and also sting if you have an open wound anywhere the vinegar touches (as in, don’t shave before you use it in your hair). Unpasteurized is best, but I have to admit that I’ve just been using normal off the shelf vinegar from Wegmans.

Dilute with some water before using so you don’t dry out the surrounding skin too much.

This is my last and repeated step.

Steps For Care

This is the pattern that I’ve been using.

1. I cleaned the area carefully with a conventional astringent.

2. I applied a thin layer of honey to the enter back of my neck, just using clean fingers.

3. Before I went to bed on the first night, I applied a good amount of lavender oil directly to the entire area. I tried both my fingers and a cotton ball, and found that clean fingers was easier to make sure I got the right area of my neck since I couldn’t see the outbreak. If you have someone to help you, you may want to have them apply it for you with a cotton ball or cleansing cloth.

4. The next morning I diluted some vinegar with regular drinking water in a mason jar. Using clean fingers again (though if you want a cotton ball would be fine) I applied the vinegar several times to the site. Be aware this can be drying so you may want to follow with a light moisturizer.

5. I’ve kept the jar in the fridge, applying a little bit of vinegar every day before I go to work with clean hands. Again, you may be more comfortable applying with a cotton ball.

Over three nights I have the outbreak down to where I’m confident it’s healing-and healing much faster than I think it would be otherwise.

Linked to-

Frugally Sustainable

Horror Confessions: They’re So Big and Whaley

whale

Mid thinks that I’m hilarious.

Hilarious, I tell you. He likes to look at me sometimes and say, “Well…they’re so big. And whaley. Big and whaley.”

This is because one night after putting in a 13 hour shift I informed him about my hatred of whales. I hate them. They’re as big as a bus and they’re just out there…floating. So big. and whaley. Big and whaley.

You know why? Because they are. There should not be a creature on this planet the size of a school bus-and don’t make me think about the fact that there is water deep enough on the planet to comfortably hold entire pods of the things.

I’ll be twitching in the corner.

I was not that child that had pictures of Orcas and dolphins on their walls. Well, maybe dolphins because they are just different enough from whales to be safe.

I mean, there has to be horror movies about whales but you won’t find me watching them. Well, there seems to be one anyway. And it gets a partial pass for being shot in Newfoundland. Unlike my hatred of Jaws and sharks, I have no idea why I hate them as much as I do.

Horror Confession: Whales scare me more than Michael Myers.

Horror Confessions: It’s all Chernabog’s Fault

Night on Bald Mountain was most likely NOT my first run in with horror.  But that’ll be another entry at some other time. I think though that it ranks right up there with formative brushes with horror.

I know that July is Retro Horror Month on Horrific Knits, but unfortunately we experienced an unexpected death last week and it’s thrown me for a loop. I’ve only recently been getting back into my horror grove-expect more reviews (and Ghost Month in August!).

From a really young age-I mean, really, who asks for Classical Thunder for Christmas at 10 years old? This blogger, that’s who-I’ve been drawn into the heavy baroque classical pieces-both in the sense of heavy ornate music and actual Baroque period pieces. I think Chernabog has a lot to do with it.

I remember watching Fantasia as a kid and sitting sort of glossy eyed through the Night on Bald Mountain piece. To this day I still love that piece of music, as well as Ave Maria. Ironically, I don’t remember the Bach piece from Fantasia at all-Bach is now my favorite composer. As long as he stays away from the harpsichord. I never did grow to like those things.

Horror Confession: an animated Disney demon turned me into a classical music lover.

Purple Butter

I know that it’s not the most descriptive of names, but I like the way that it sounds. But then, I like the way that the world ‘purple’ sounds in general, so.

It’s funny how recipes evolve. When I found out that this was ‘berry’ month for Can It Up I knew that I wanted to work with blueberries and unrefined sweeteners. Unrefined sweeteners are slowly revolutionizing my life, along with unbleached flour. My thought at first was to go for blueberries and maple syrup. But I could never bring myself to pay what anyone wanted for blueberries this year; I don’t know if I’m just getting more cautious with my fruit money this summer and freaking out because I can get pounds of stone fruit for $.99 or if the berries really are just that much more expensive because June had twice the average amount of rain. I’m not sure.

So I bought a single, lowly pint of blueberries and they hung out in my freezer along with what’s left of last season’s cranberries.

Then there was the issue of maple syrup. Maple syrup at home is cheap; I lived in maple syrup country. For that matter, I’m all too familiar with the smell of tapping and boiling on cold winter mornings-my dad used to do it. I should have had my mom get some when she came up for her last visit. I had sticker shock at the farmer’s market (and the farmer’s market with the best prices, at that). So I ended up with wildflower honey-it was half the price.

So at the end, I had blueberries, cranberries, about 1/2 pound of cherries, and the honey. I decided to just be as low impact as possible and make a fruit butter.

If you don’t have an immersion blender, use a potato masher.

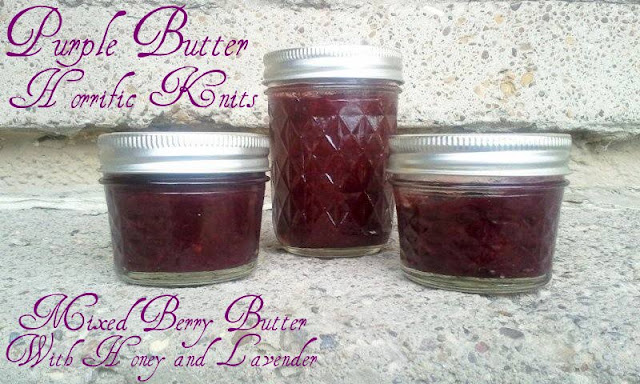
Purple Butter

Mixed berry butter with lavender and honey

Roughly 4 oz honey

1 pint or so blueberries

1/2-1 cup cranberries

1/2 lb cherries, pitted

pinch dried lavender (optional)

In a crock pot add all of your berries along with a splash of orange juice. The juice is just to make sure that your berries don’t scorch before they start to reduce down. Don’t add too much or you’ll just add more cooking time as the water still has to evaporate off.

Place lid on crock pot so that steam can escape; cook on high for at least an hour. Turn crockpot down to low and cook until berries burst and reduce down (or overnight). Using an immersion or stick blender, process until just smooth.

Reduce until mixture will mound up and hold its shape on a spoon. Add your honey (more or less depending on how sweet your fruit is) and lavender; let cook for at least another 15 minutes.

Process in a boiling water bath for 15 minutes, or jar and freeze. This batch gave me about a pint’s worth of butter, but yield will depend on how long you reduce it and how much moisture is in your berries.

Use your butter on toast, mixed into yogurt, over cake for a simple dessert, or mixed into bbq sauce.


Bloggers-I have started a new group board on Pinterest. Open to all DIY, craft, food, or other creative blogs, I would love to have you join. Joining instructions are posted on the board-join here.

Please, stop by this week’s Inspired Weekends!

Linked to-

Inspire Me Monday    Marvelous Mondays    The Chicken Chick

Flour Me With Love     Frugally Sustainable

april’s homemaking

weed em and reap

a pinch of joy

clairejustine

bakewell junction

heavenly savings

six sisters stuff

cooking with curls

this gal cooks